I build a digital to analog converter for the RC2014:
[TODO: insert video here]
Digital to analog converters are useful for interfacing microprocessors to analog devices. They typically take a digital value of a fixed number of bits (in our case 8 bits) and convert it to an analog voltage or current. The DAC presented in this blog post will convert a value of 0-255 into a voltage from 0V to 5V.
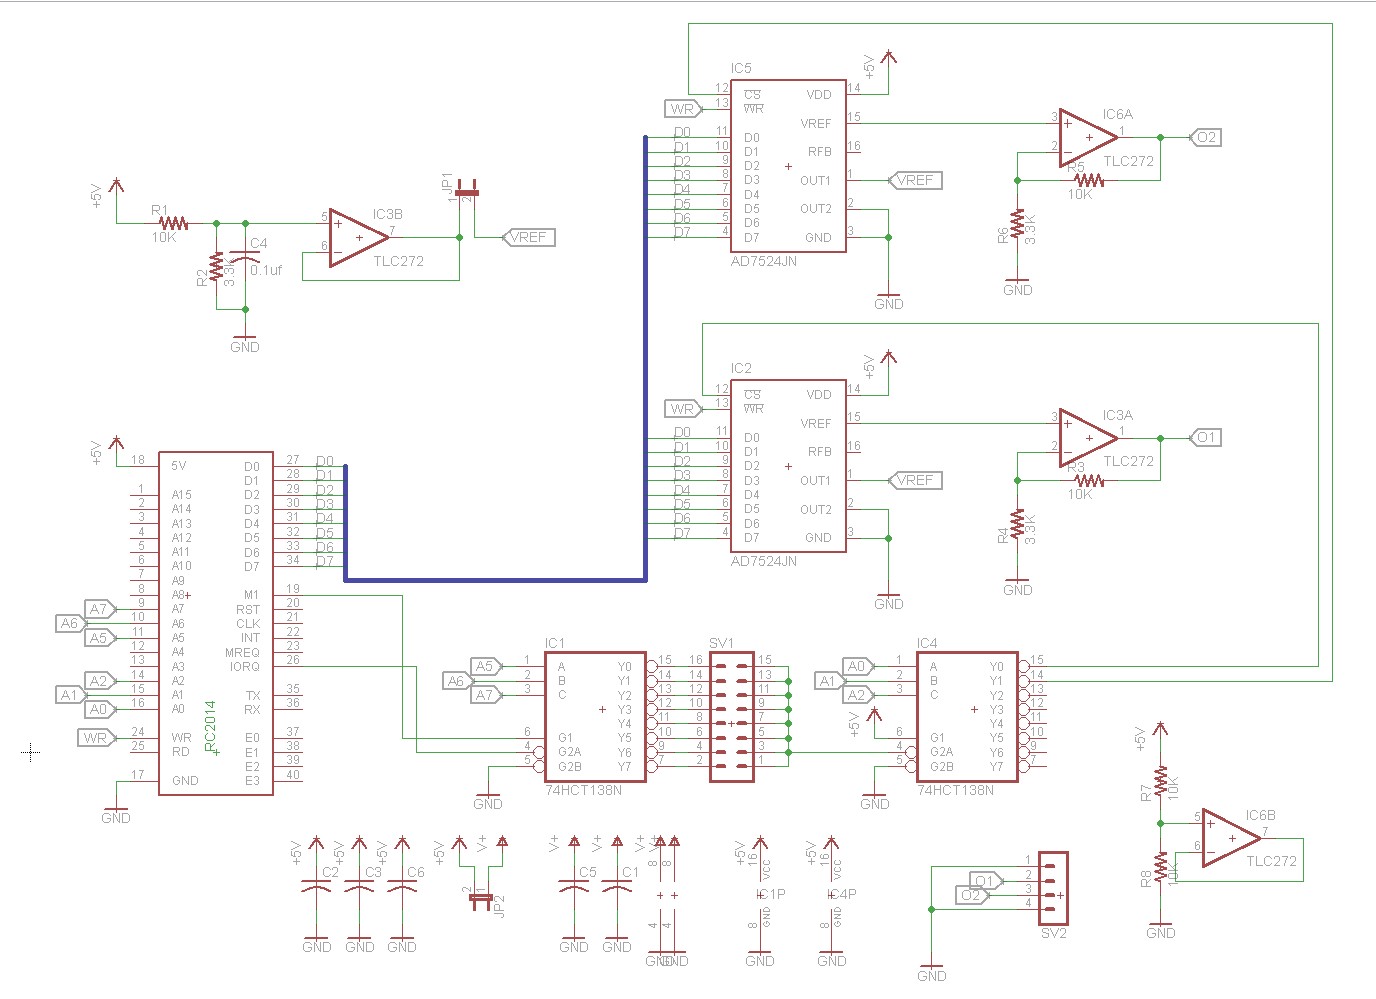
Schematic:
The schematic is shown below:
The DAC I chose to use is an AD7524. It’s an 8-bit DAC, and has CS and WR pins, making it easy to digitally interface to an 8-bit microprocessor like the Z80. I also considered the DAC0808 (and even ordered some!) but the DAC0808 lacks an input latch, and would have necessitated adding additional chips to the circuit.
Address decoding uses a couple of 74HCT138 chips, just like most of the RC2014 peripheral boards that I’ve designed. One 74HCT138 allows MSB selection of the IO port (00, 20, 40, 60, …) and the other uses the LSB to select which of the two DACs is enabled (00/01, 20/21, 40/41, etc).
I used the technique at http://www.waveguide.se/?article=a-simple-dac-using-the-tlc7524 to connect the AD7524 up to an op-amp to buffer the output. This seems sort of backwards, using the OUT1 pin as an input and the REF pin as an output, but that’s how the TLC7524’s datasheet describes voltage mode operation. The waveguide.se article contains a further refinement by Kevin Baker to divide the 5V down to a 1.25 reference voltage using an op-amp, and then multiply the resulting output value back up to 5V. It tried this technique, and it works with the caveat that not all op-amps are capable of rail-to-rail operation.
TheTLC272 op-amp that I used in the board can only output about 4V with a 5V Vcc. For this reason, I broke the op-amp’s Vcc output out to a header so that you could, for example, supply a 6V or 7V Vcc to get the full output range. An alternative would be to choose an op-amp with better rail-to-rail performance. I’m planning on trying out a TLV2462 at some point.
Implementation:
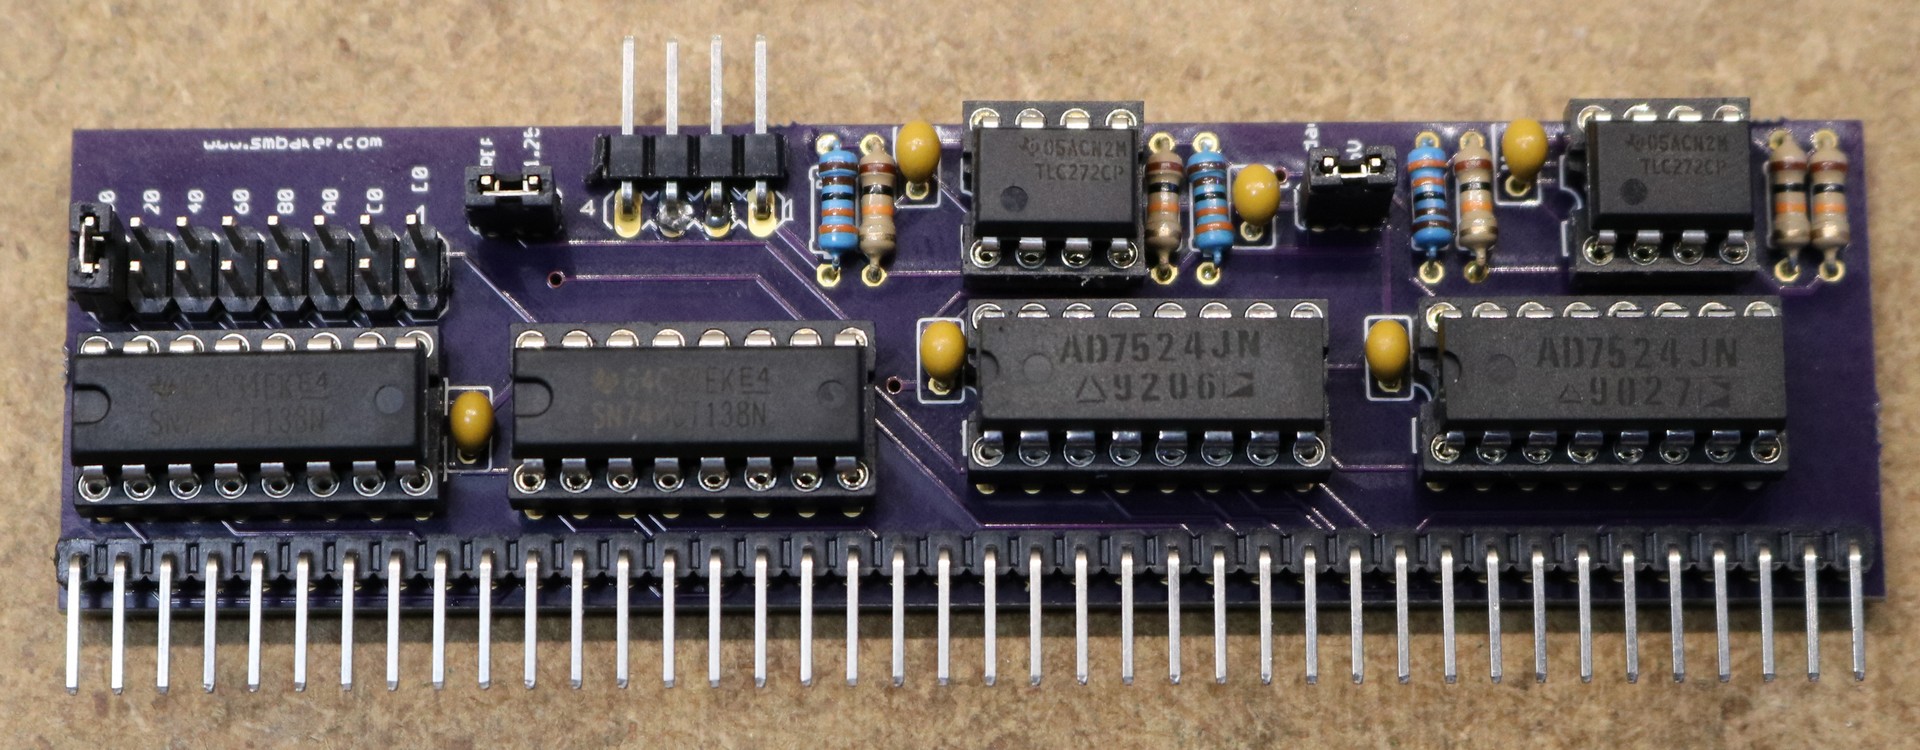
Here’s a picture of the completed DAC board:
This is one of those boards that actually worked right the first time.
Usage
Usage is pretty simple. Assuming the board is jumpered to the 00 address as shown above, just output the appropriate value to port 00 or port 01. For example,
REM set DAC A to 0V output
OUT 0, 0
REM set DAC A to 2.5V output
OUT 0, 128
REM set DAC B to 5V output
REM (note: using TLC272 op-amp with 5V Vcc, this will top out around 4V)
OUT 1, 255
Ordering a pc-board
As with most of my RC2014 boards, I’ve made it available on Osh Park. I don’t make any money off the Osh Park sales, and they only sell boards in multiples of 3, but it’s a way for you to get the pcboard to work with.


