In this video I build a computer that uses eight 8008 microprocessors to play Conway’s Game of Life
Motivation
I’ve been looking to do a parallel computing project for a while. I’ve toyed around with lots of different ideas — everything from 8086 to Z8000. But lately I had done a few 8008 CPU projects and I decided to finally take the multiprocessor leap and design myself a small multiprocessor computer.
The first thing I had to do is to select a problem that I wanted to solve, and then create as general-purpose as possible a computer to solve that problem. I chose Conway’s Game of Life. It’s easily parallelizable, but is not an “embarrassingly parallel” problem — the tasks are not fully independent, and some communication between peers is necessary. So while it’s very easy to gain some performance form parallelizing it, it’s still not trivial. Conway’s is something I have implemented on several other computers, so I’m familiar with how to write it. It’s something I knew I could code up in assembly in a weekend afternoon.
Introducing Master and Blaster
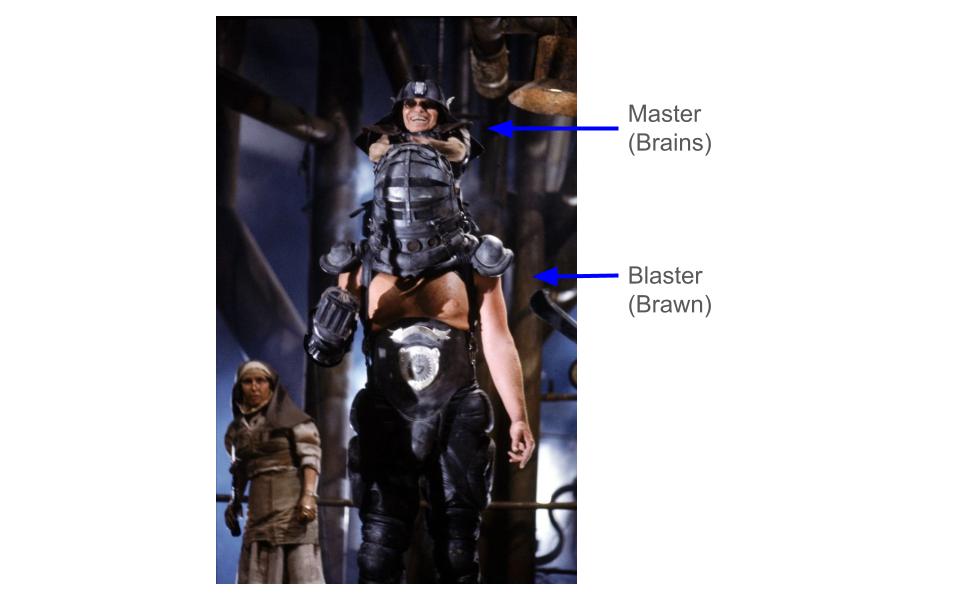
Master and Blaster come from the cinematic masterpiece “Mad Max Beyond Thunderdome”. They’re an almost unstoppable pair. Master has the brains and Blaster has the muscle. They make a good pair to use for controller/worker paradigms.
Master will be the smart one — we’ll give him a ROM so he knows what to do. Blaster will be the dumb one. He’ll only have RAM, and be incapable of doing anything that Master doesn’t explicitly program into him. We’ll scale out Blaster to get our parallelism:
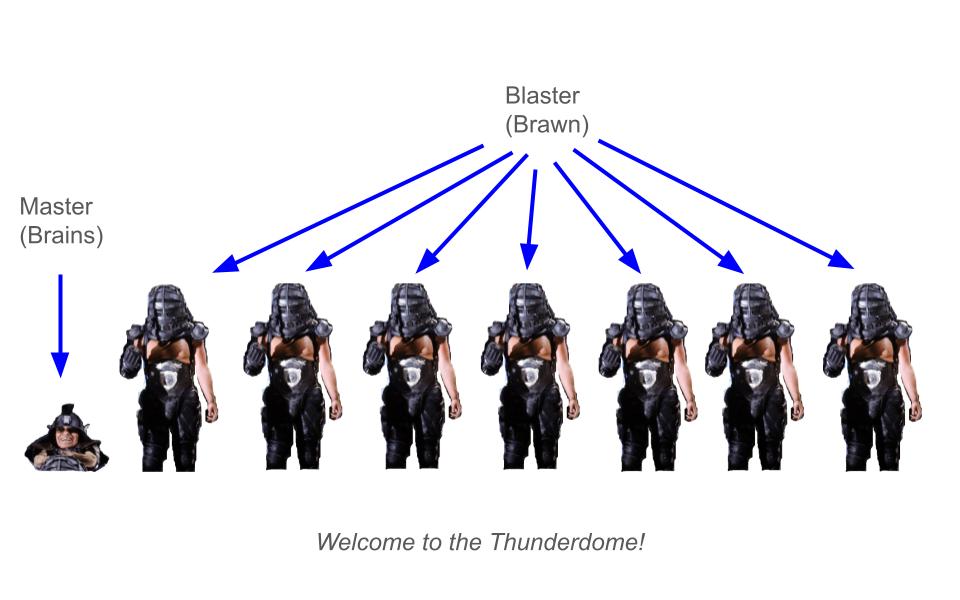
Sharing Memory
I wanted keep things relatively simple, so I went with a synchronously shared memory design.
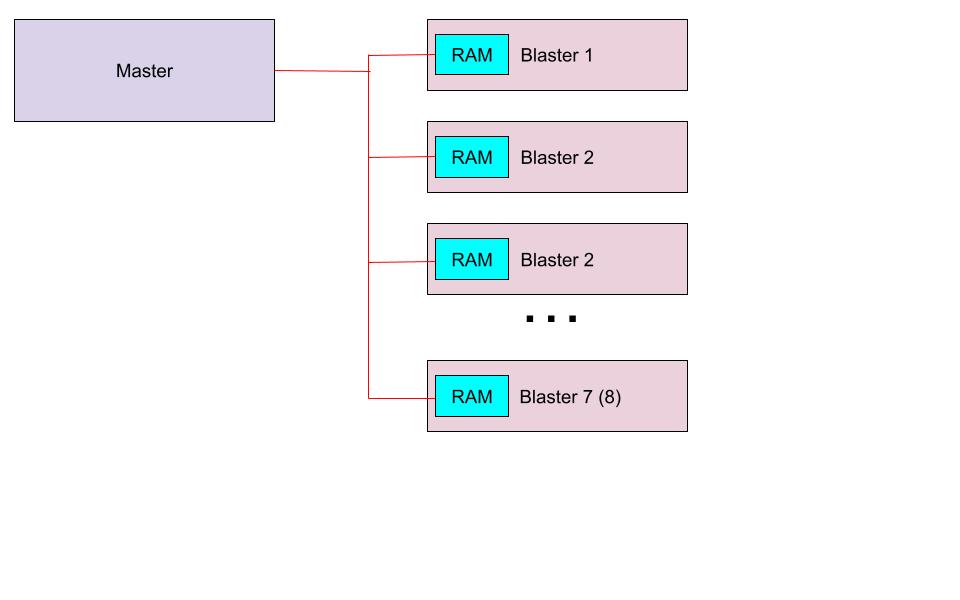
I’m calling it synchronously shared because there is a distinct order to who has access to Blaster’s memory. Either Blaster is running and using the memory, or Blaster has halted and Master can use the memory. It’s not possible for both of them to use the memory at the same time. That would actually be doable with dual-port RAM (not a technological leap forward I was willing to take), or it would have been possibly by carefully engineering waits to interleave access (not something I wanted to spend my time engineering). So I went with the simple solution of using HALT:
- Blaster halts. Literally, an “HLT” instruction.
- Master notices blaster has halted and takes control of the bus.
- Master does whatever it wants with Blaster’s memory (Read, Write, etc).
- Master releases control of the bus.
- Master sends an interrupt to Blaster to wake him up.
- Blaster exits the stopped state and executes the next instruction after the HLT.
High Level Architecture
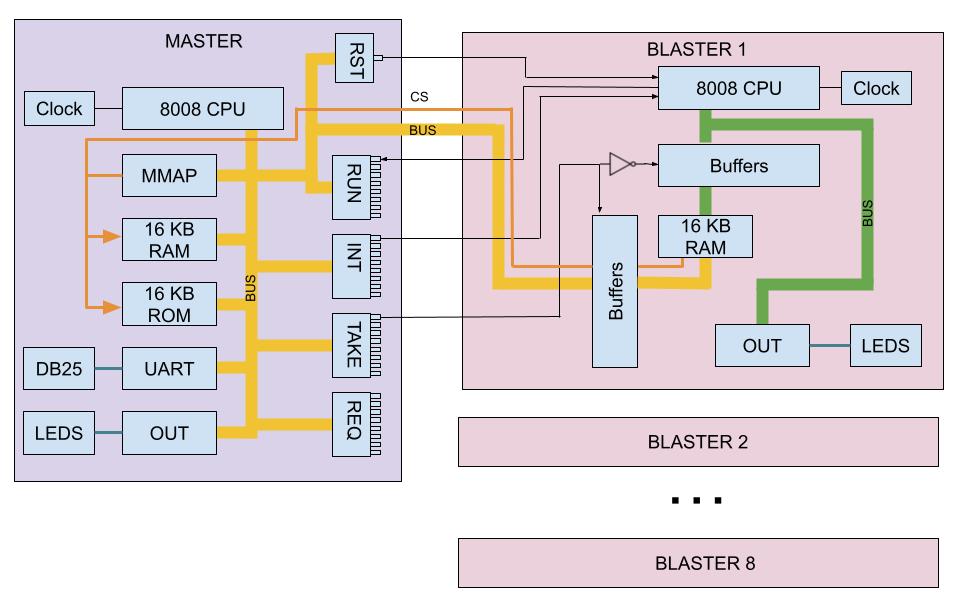
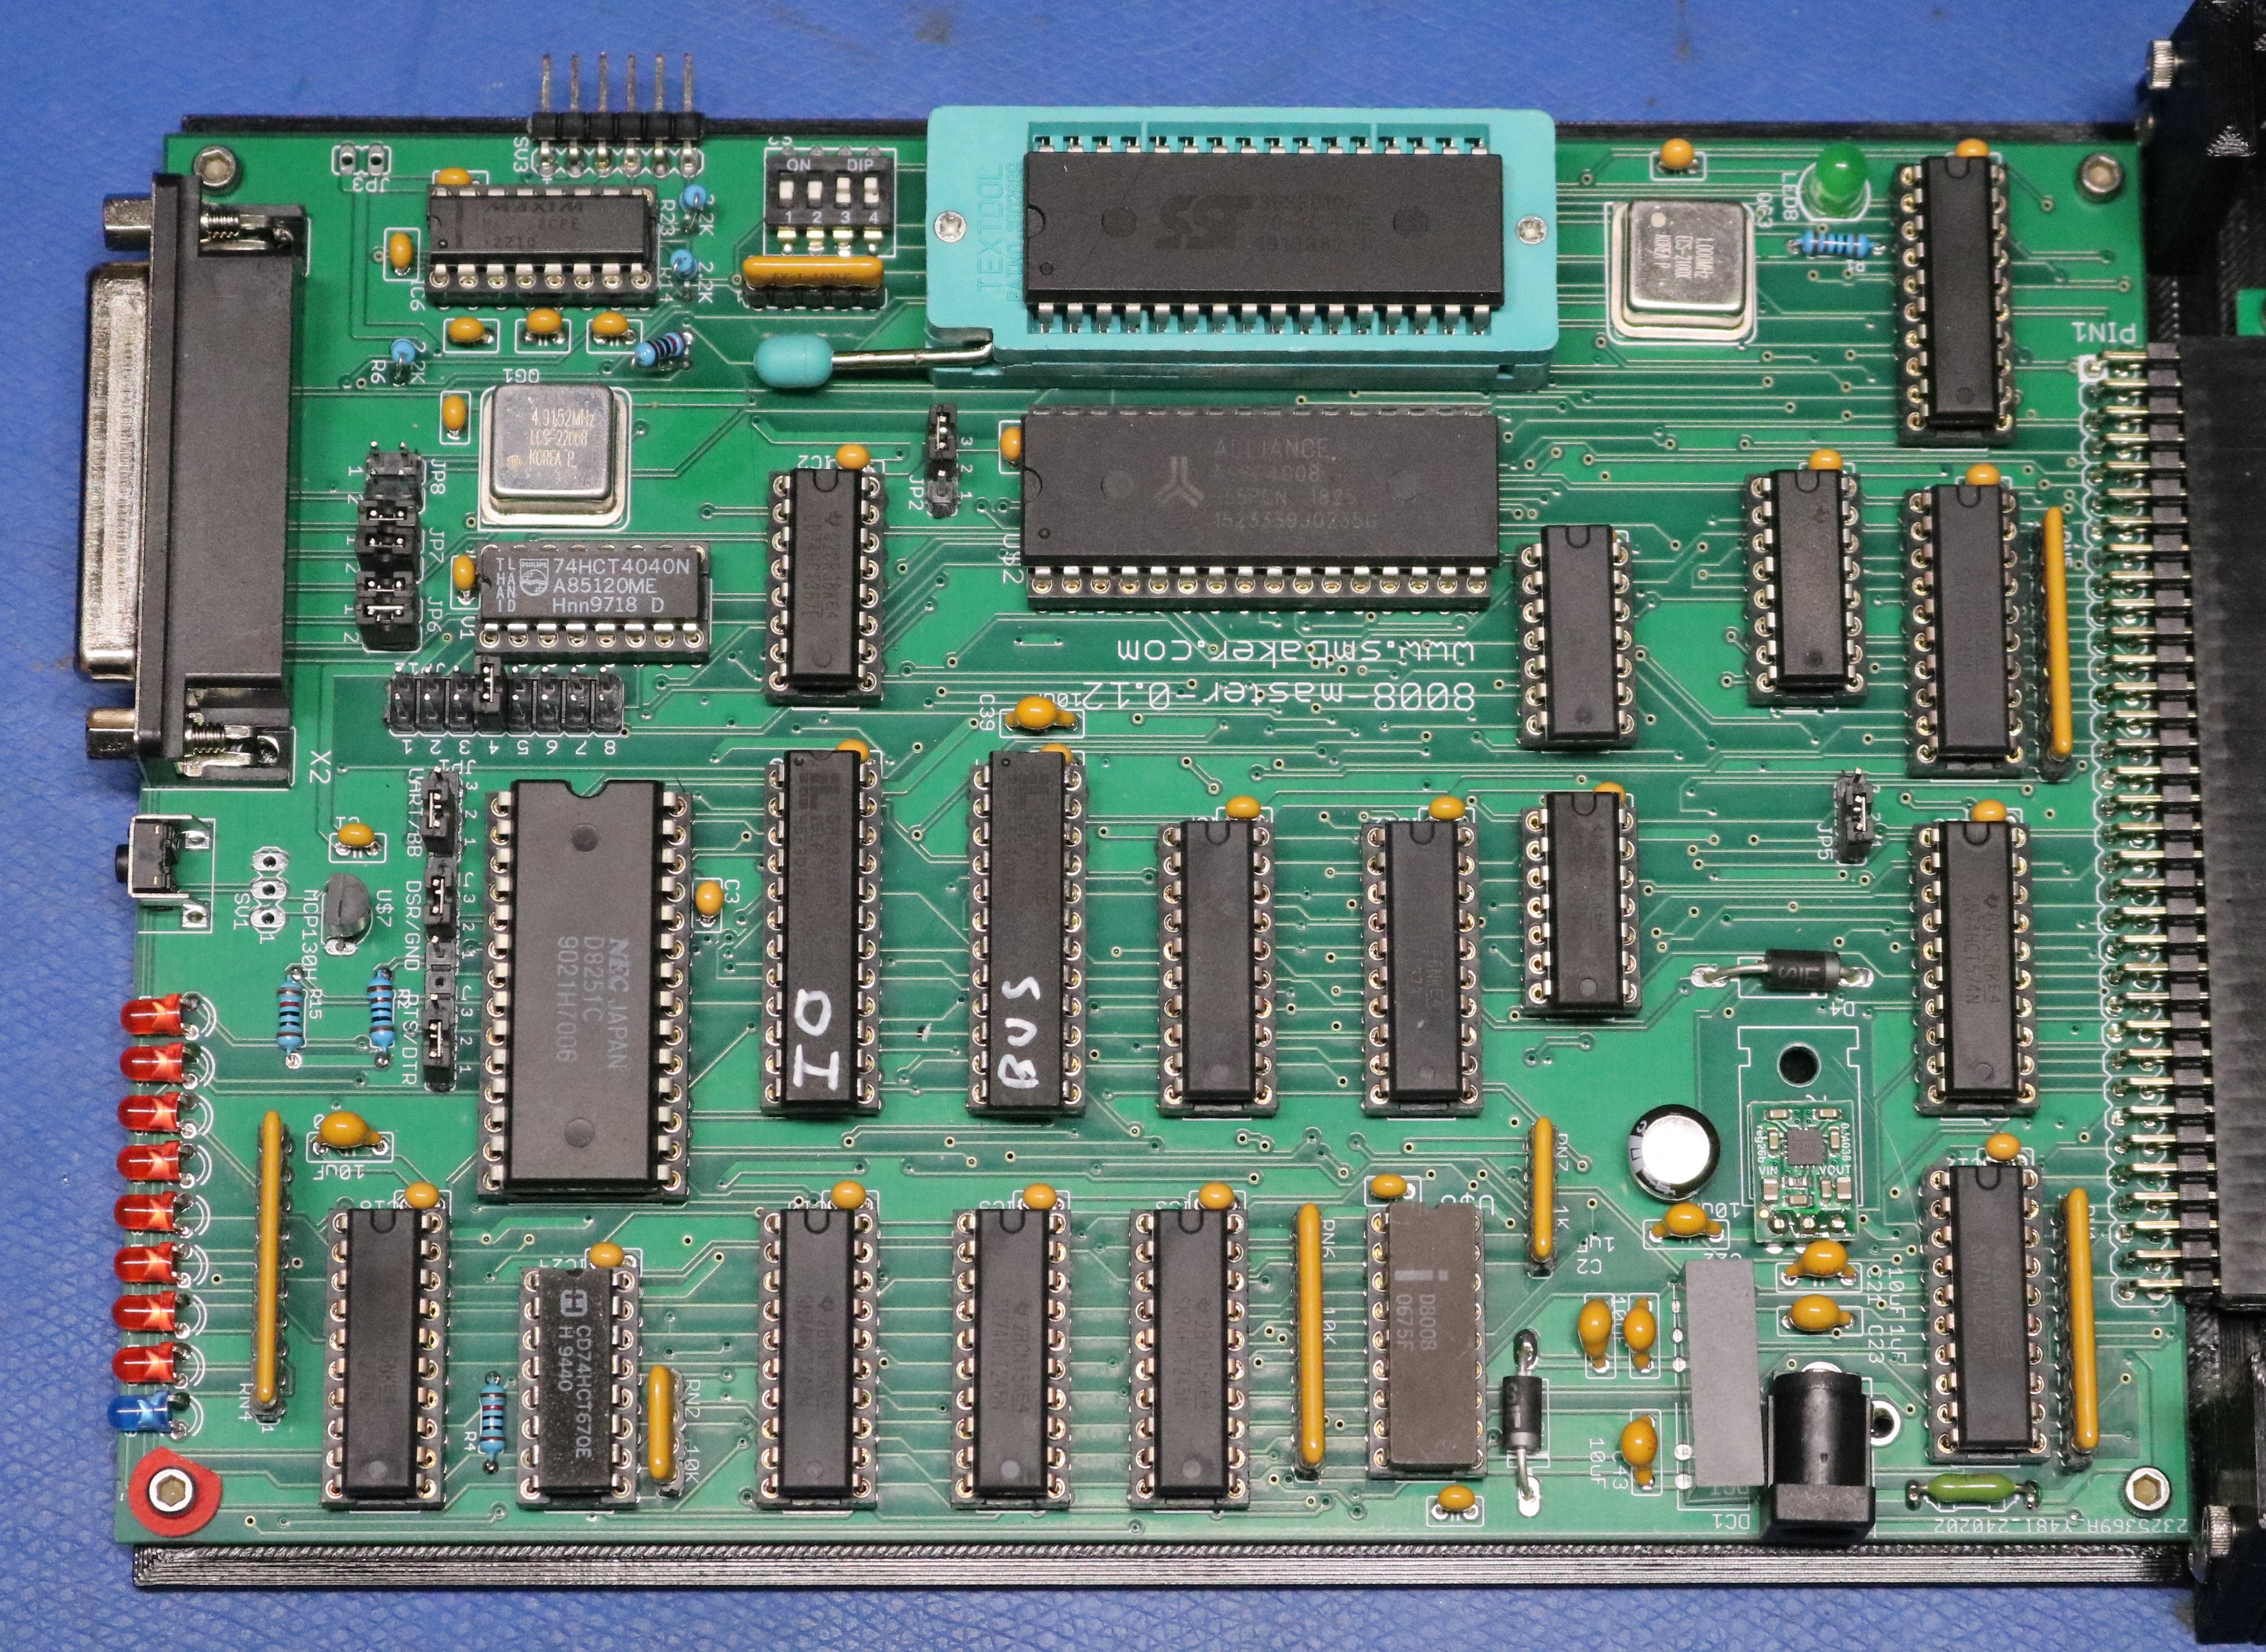
There’s a lot going on in the above picture. Let’s talk about Master first. Master has:
- An 8008 CPU, and the associated clock circuitry
- 16 KB of RAM
- 16 KB of ROM
- A memory mapper that allows the RAM and ROM and Blaster’s RAM to be mapped in 4 KB pages.
- An 8251 UART for Serial IO
- An output buffer to drive 8 status LEDs
Master also has 5 signals that it can send and receive to/from Blaster:
- RST (output) – resets all Blasters
- RUN (input) – tells whether the Blasters are running or halted
- INT (output) – interrupts a halted Blaster so that it can resume executing
- TAKE (output) – take over control of a Blaster’s RAM, so that Master can read or write it.
- REQ (output) – send a request to Blaster asking its program to kindly halt and relinquish control.
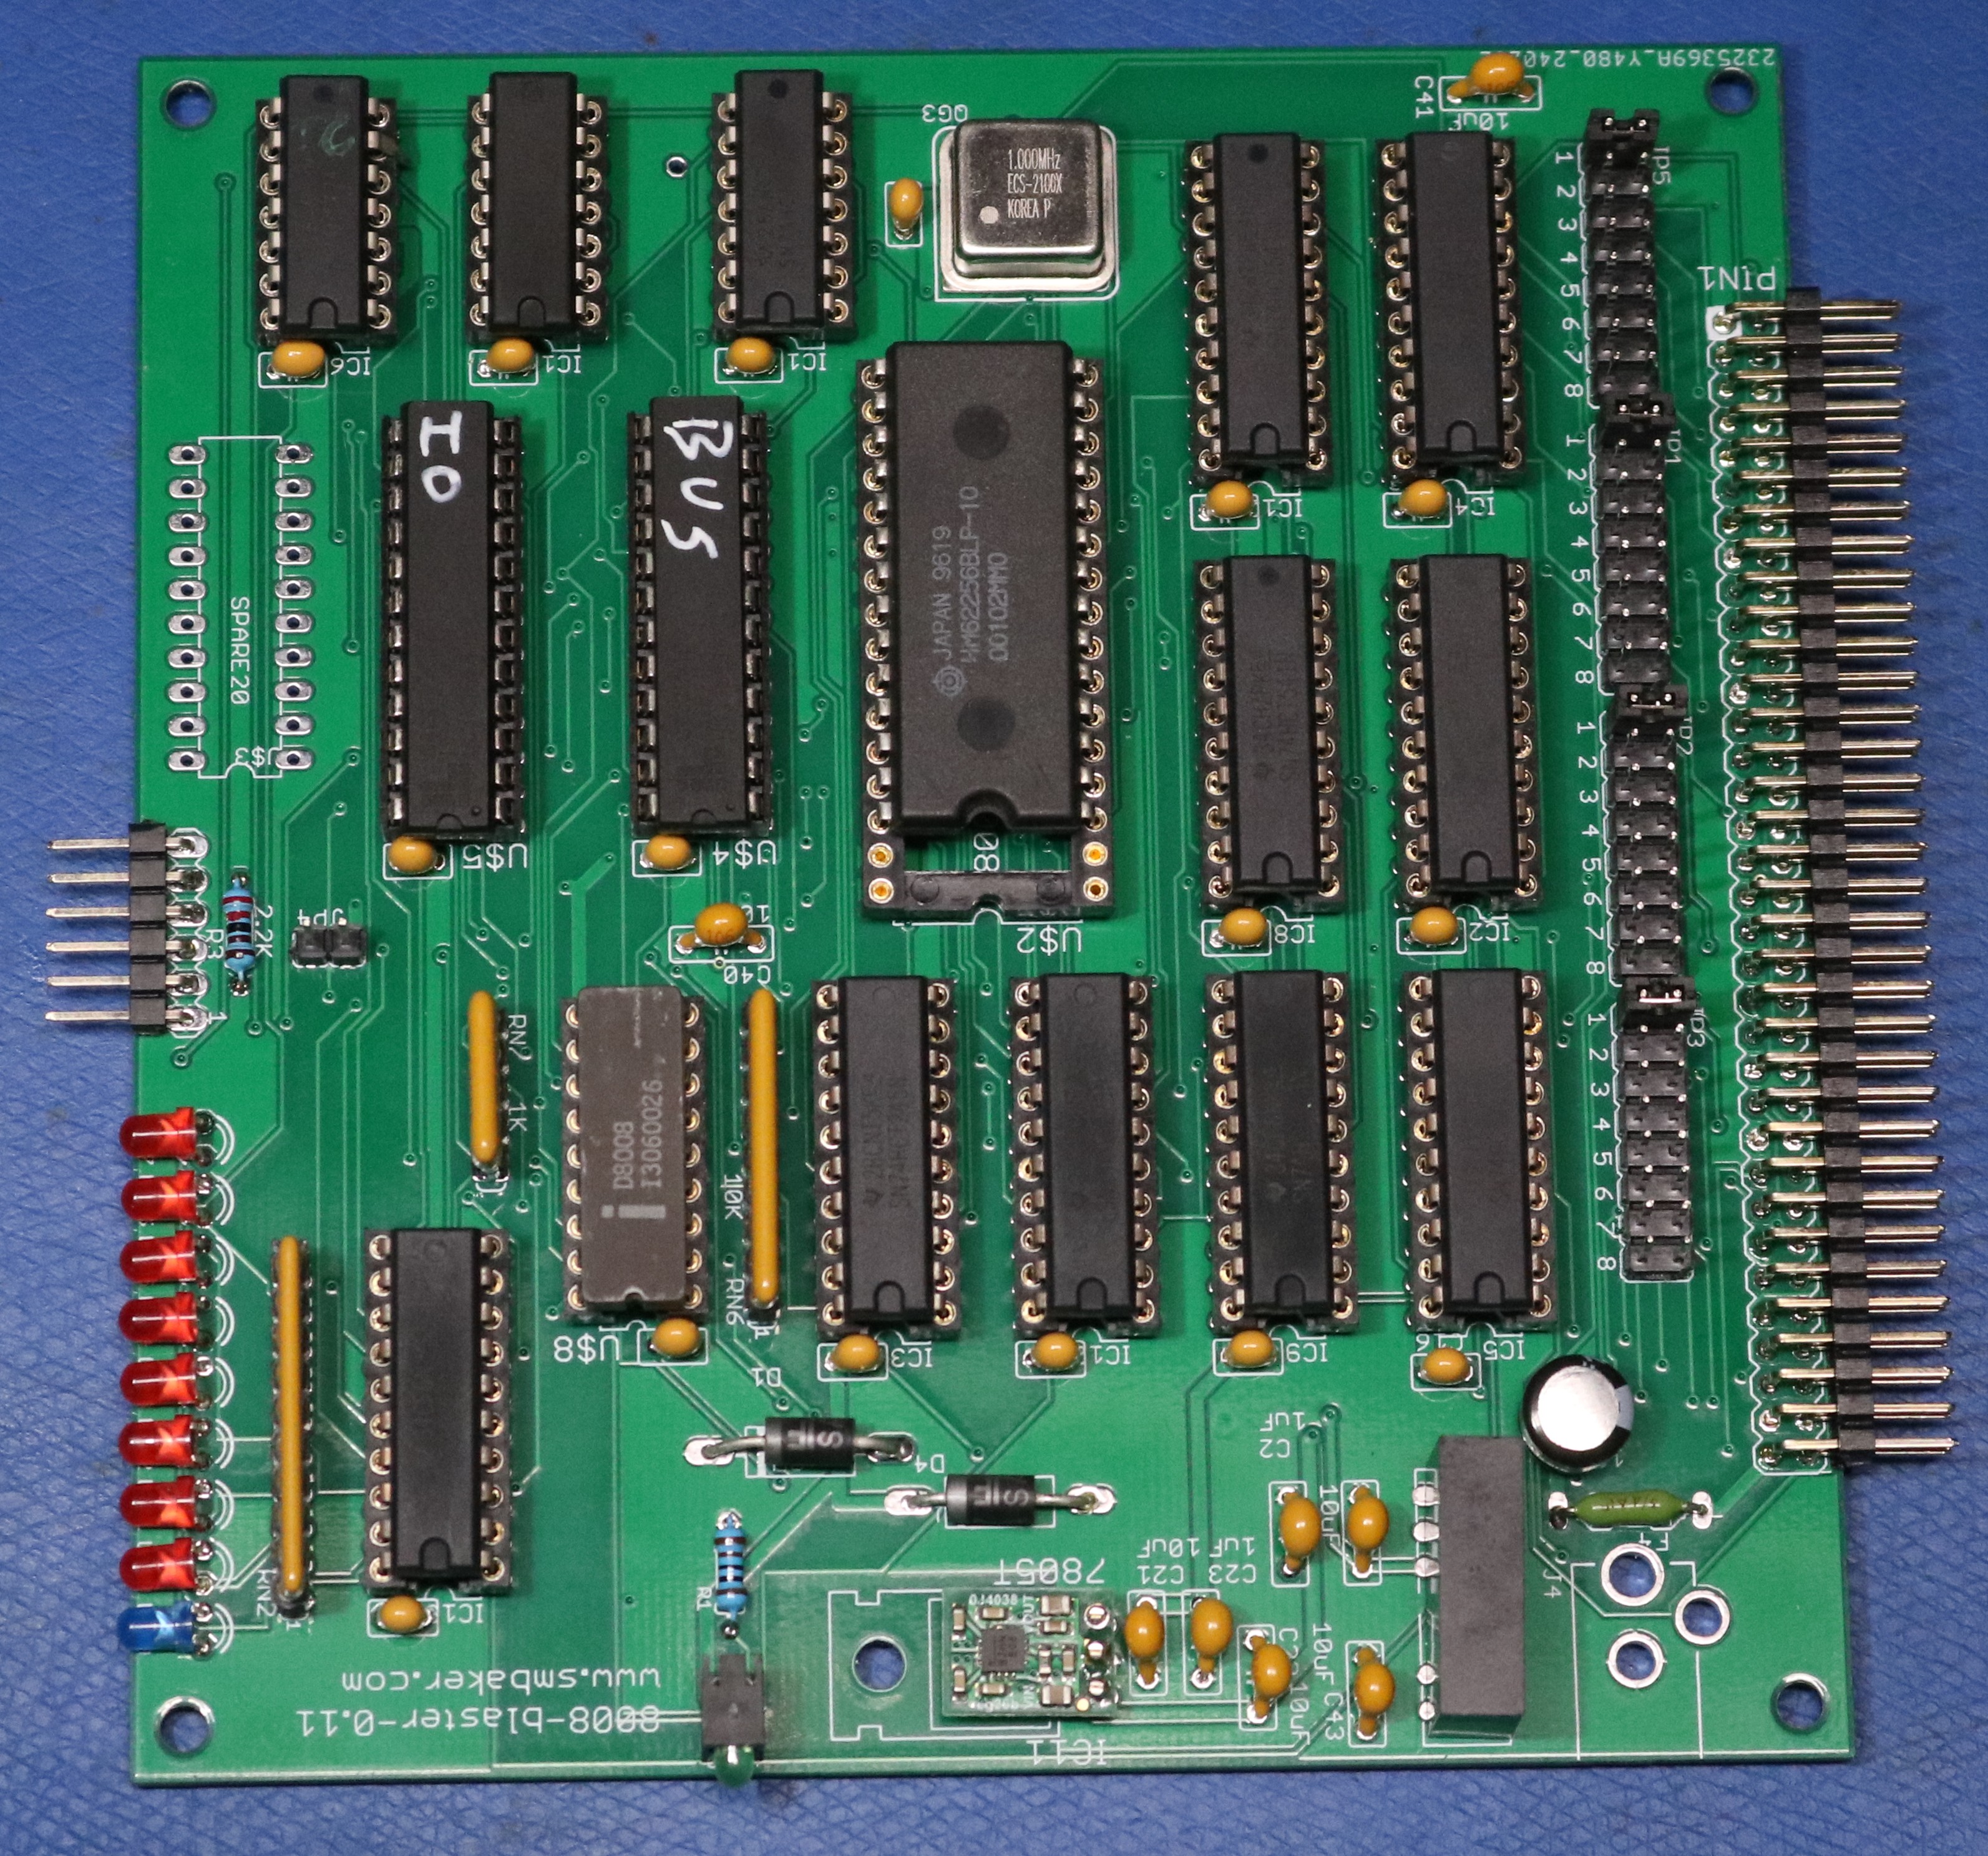
Blaster is simpler than Master, and is little more than CPU and RAM. The RAM is a plain ordinary 62256, not some fancy dual-ported IC, so only one CPU may be allowed to interact with it at a time. For this reason, I put a series of buffers on either side of the RAM. Based on the TAKE signal from Master, either the yellow bus (from Master) gets plumbed through to the RAM, or the green bus (from Blaster) get plumbed through.
For this reason, Master only asserts the TAKE signal while Blaster is halted. If Master were to ever assert TAKE while Blaster was running, then Blasters memory would be unavailable and a resistor pack would float the data bus up to 0xFF which would be a HLT instruction. Still, it’s better to just not let that happen.
Schematics
The schematics shall be found in the git repo at the bottom of this blog page.
Boards
Picture of the Master Board:
Picture of the Blaster Board:
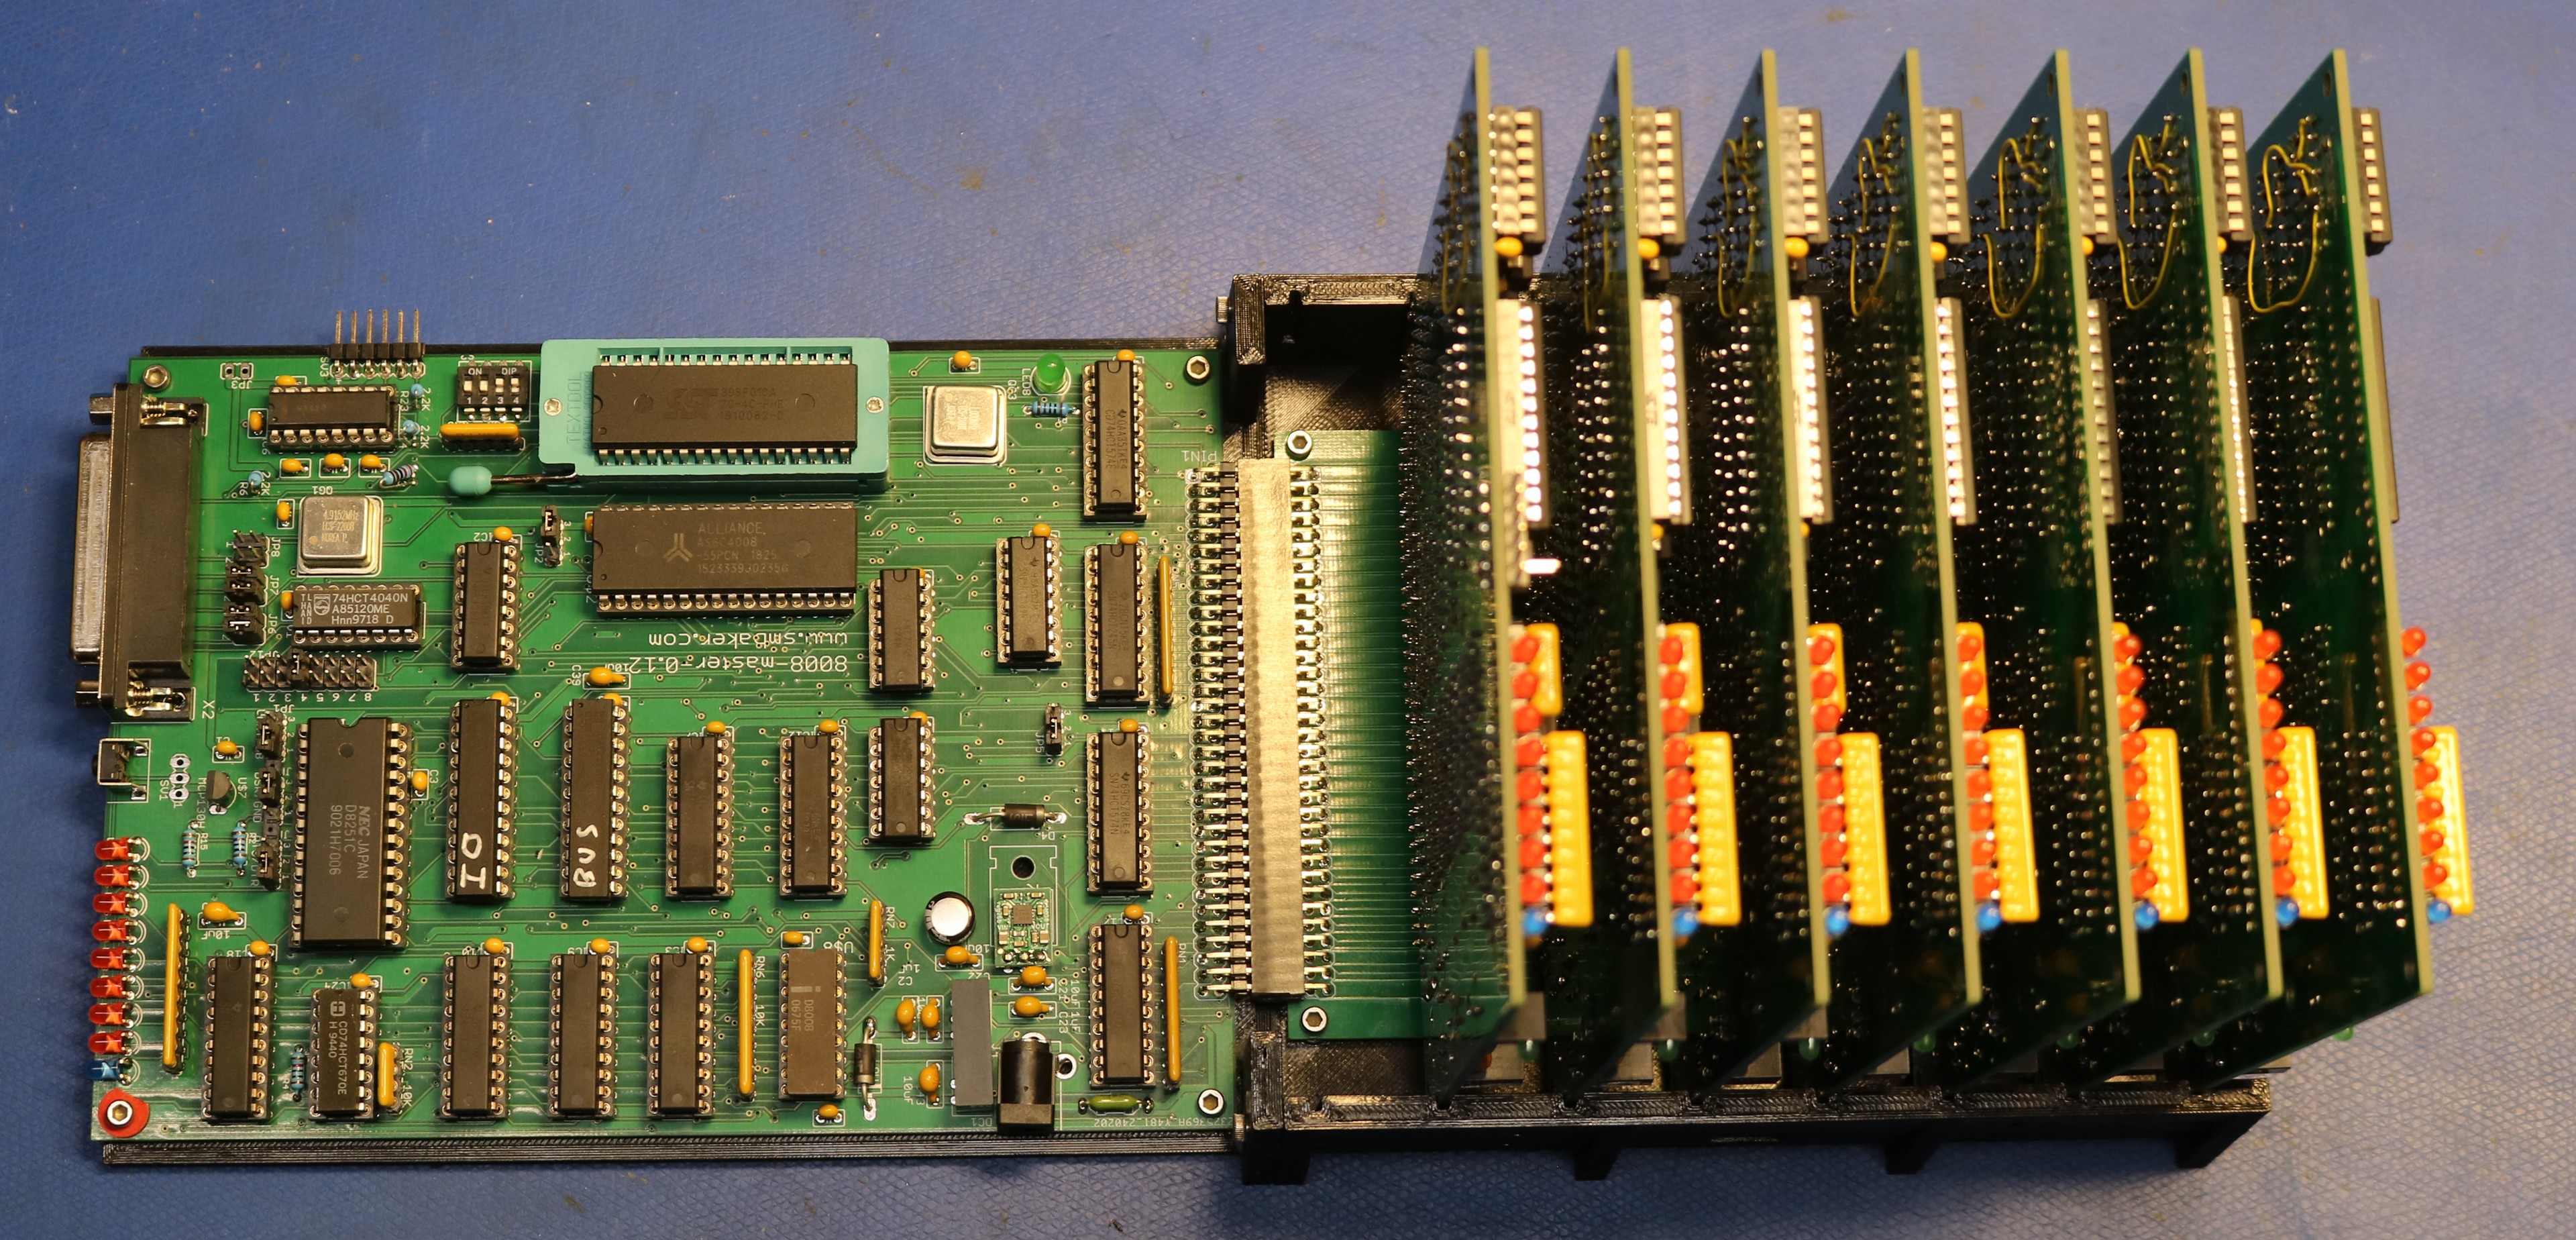
Putting it all together:
The Great 8008 Interrupt Conundrum
My first prototype failed after a few hundred iterations. Blasters would randomly drop out, sometimes getting stuck, other times appearing to start executing unexpected code locations. I got the good ol’ logic analyzer out and had a look. First, here’s a normal interrupt sequence:
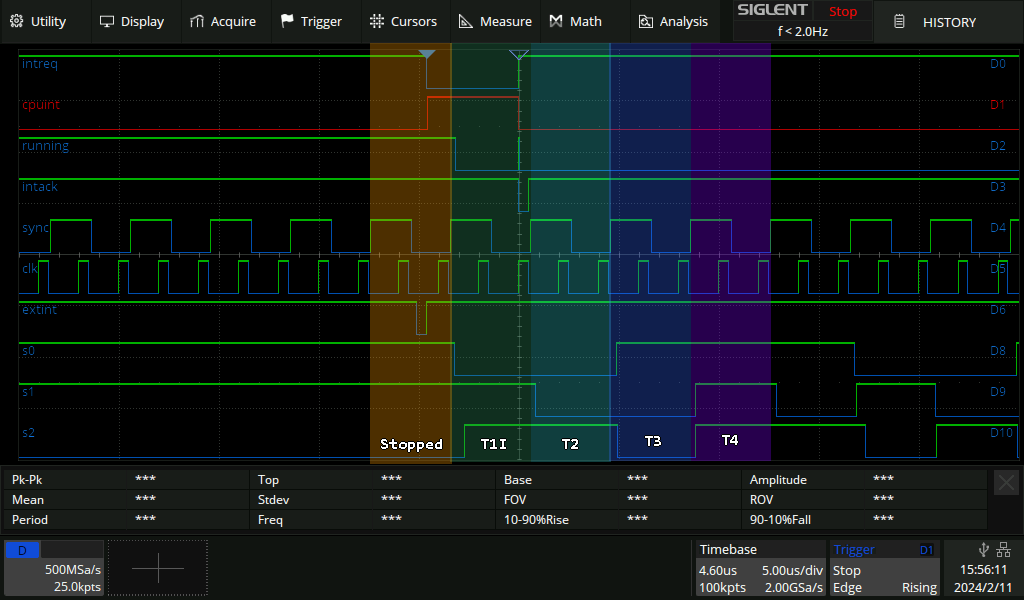
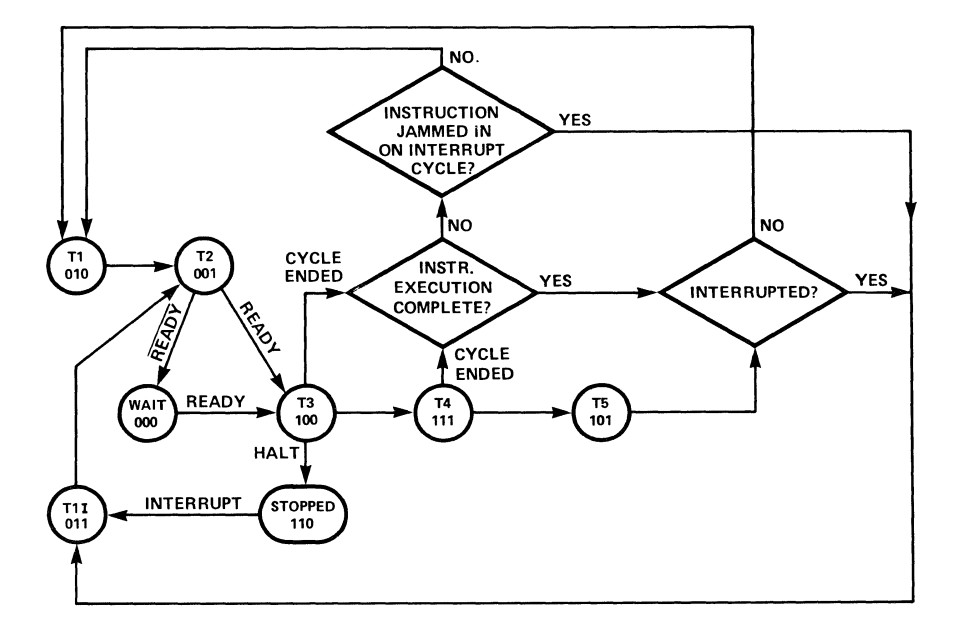
The S0/S1/S2 traces (the bottom three) indicate the CPU cycle, and this can be decoded by having a look at the 8008 datasheet. Above you can see the CPU is in a stopped due to a HLT, and then along comes an interrupt, which puts the CPU into the T1i state where it acks the interrupt. T1i is then followed by T2, T3, T4, … Just like the datasheet says it should. But then I also saw something like this:
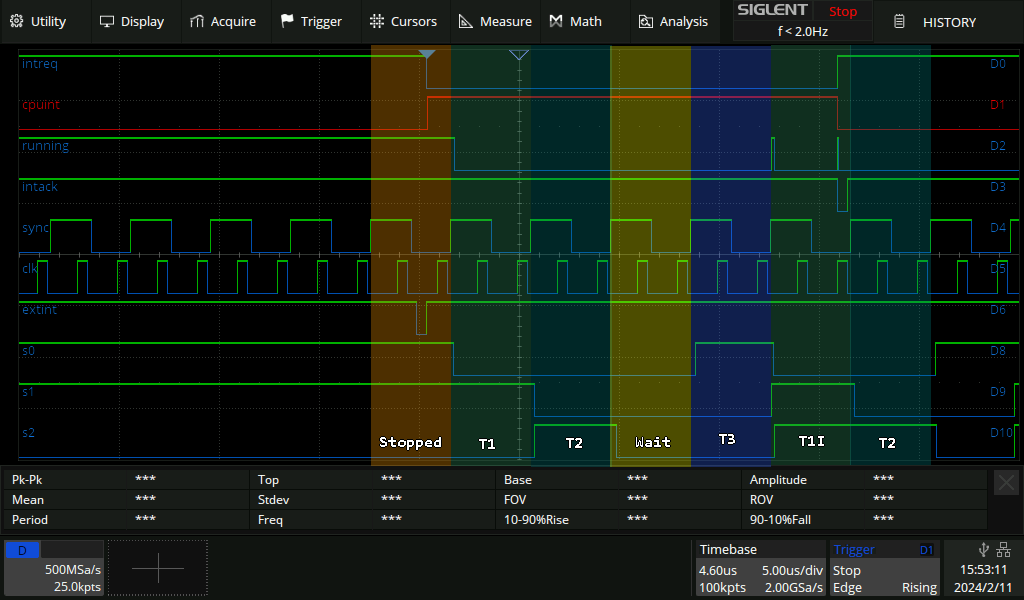
What happened here? The 8008 went from stopped into T1. That’s not an allowed state transition per the 8008’s datasheet. Furthermore, it then executed a WAIT, even though I have the ready line permanently pulled up. What is going on here????!!!
By capturing a large number of traces, I was able to correlate what was triggering the issue. It happens when the INT occurs at the exact time that the O1 clock drops:
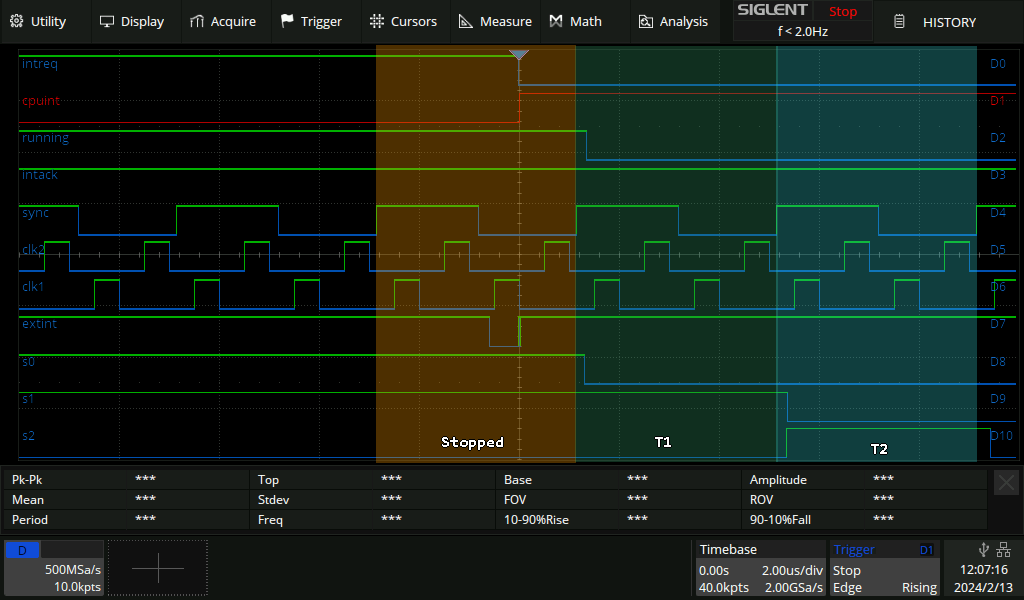
Move it just a few nanoseconds earlier or a few nanoseconds later, and it’s fine. I ended up solving this by using a flipflop to ensure I only interrupt on the low-to-high transition of O1, and never on the high-to-low transition:

In the above schematic, /EXT_INT is the signal from Master to interrupt Blaster. /INTACK is the interrupt acknowledge from Blaster’s 8008, basically a decoding of the T1I signal. The leftmost flipflop is an edge trigger so that we only assert an interrupt when /EXT_INT goes from low to high, and then we clear it when /INTACK occurs. The rightmost flipflop ensures that we only change the interrupt signal on a low-to-high transition of CLK01. /INTREQ is an active low interrupt signal (it later gets inverted in a PLD, before going to the CPU). After I fixed this problem, I happened across a similar discussion on Len Bayles’s website, and a similar solution.
My casual read of the datasheet did not reveal any indication that I needed to take such care with interrupts. Maybe I missed it. I’m sure this was well known back in the 1970s, but a lot of that knowledge has been lost due to time.
Spreading Conway’s Game of Life across multiple CPUs
I went with a relatively straightforward solution, which involves dividing the grid into various 4-row blocks, one block goes to each Blaster:
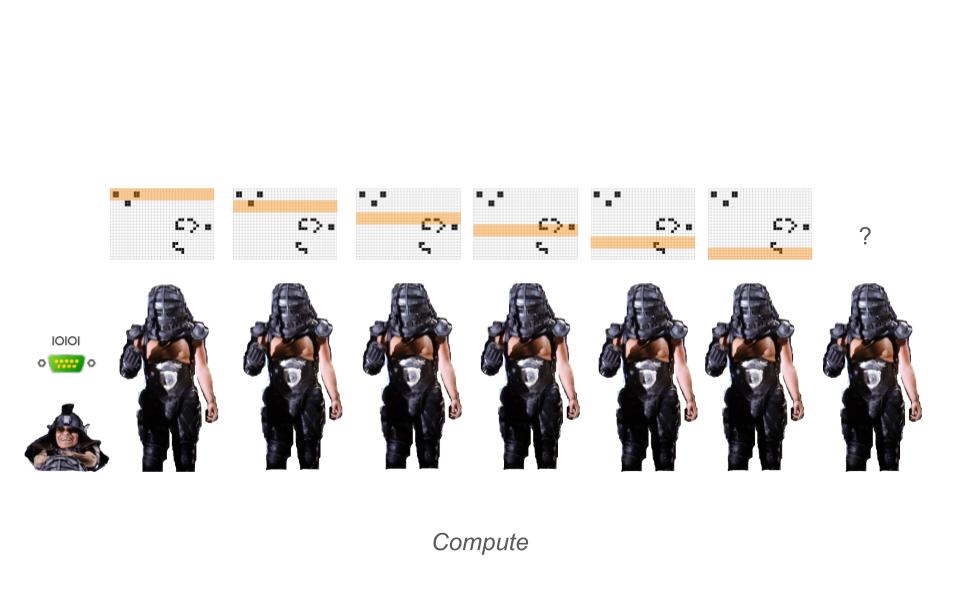
I opted to go with a 64 column by 24 row game area. That means that each Blaster is responsible for exactly 4 rows, and multiplied by the width of the row, that makes each Blaster responsible for 256 bytes of game space. The seventh Blaster sits idle — it would potentially more overhead due to the complexity of trying to use him than just to ignore him.
The Game runs continuously in two phases:
- Phase 1 – Compute. Each Blaster examines it’s four “old” rows and computes the “new” cells for its four rows.
- Phase 2 – Read and Update. The Blasters halt, and Master individually reads the rows from each blaster’s “new” cells and writes them back to all Blasters’ “old” board.
Phase 2 is implemented efficiently by having a special “TAKE on Write” (with the symbol /TAKEW in the schematics) that will cause Master to always write to all Blasters, regardless of the of the individual TAKE settings. For example, I can set TAKE=1 and assert /TAKEW. This will cause a read to come from Blaster#1, but a write to go out to all Blasters. This makes Phase 2 pretty efficient and simple. I can give each Blaster the full game board without incurring a penalty.
Power Consumption
In the build I used in the video, which includes 1 Master and 7 Blasters, the overall power consumption measured on the 12V supply to the backplane is:
| Program | Watts | Notes |
|---|---|---|
| ID | 14.87 | Blasters are halted 100% of the time. Only a few LEDs lit |
| Freerun | 17.25 | Blasters are running 100% of the time. Rapid counting on the LEDs. |
| Conway | 16.25 – 17.5 | Varies between Blasters running (for compute) and Blasters halted (for Read/Update). Spends some time with LEDs counting, and some time with all LEDs lit. |
Resources
- Github repository containing the PLD files, and other MasterBlaster related code: https://github.com/sbelectronics/8008-super
- Github repository containing the monitor and game of life implementation: https://github.com/sbelectronics/h8/tree/master/h8-8008. Yes, it’s found in my Heathkit H8 repo, because this is where my 8008 projects started, with the H8-8008 board. The software there builds for a variety of different boards.
May I ask the manufacturer and part number of the DC/DC converter, which I am guessing generates the -9 volts