—> Looking for the Nixie Tube Calculator? Find it here!
This year I decided to jazz up the Christmas lights a bit. Gone are the cheap icicle lights from the local hardware store. In their place are individually addressable LED bulbs. This page will document what I did to get it working.
Source some light bulbs
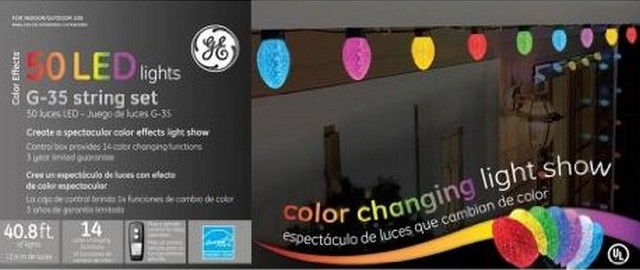
I was amazed by some multicolored bulbs that I saw on a neighbor’s house back in 2013. This year I decided to find out what they were and make them my own. Some googling revealed them to be “GE G35 bulbs”:
These lights are individually addressable and very hackable. The instructions on Robert Quattlebaum’s website told me everything I needed to know to control the lights, and his git repo even has working code. Seemed an easy task. Just acquire the lights. These seem to have been readily available a couple of years ago (particularly from Costco) but I had relatively poor luck finding them this year. I ended up settling on some Amazon seller and buying at double the cost that they could have been acquired from post-Christmas sales at Costco. Opened the box, it even says Costco on the baggie of plastic mounting hooks. I made someone an easy 60 bucks (note to self: check Costco for lights post-Christmas, and see if I can recoup my cost by reselling a set or two next year).
GE does seem to have some newer lights; these may not may not be out of production. The new ones are called “iTwinkle”. I have no idea if they’re protocol-compatible with the old ones.
How to do this with a Raspberry Pi?
The Raspberry Pi is a great Linux single-board computer, but I’m not sure it’s really up to the task of bit-banging the protocol for these lights, at high speed, in real time, without introducing visual artifacts. There are some techniques out there for shutting down interrupts while bit-banging GPIO, but I really don’t know what affect that’s going to have on the kernel, nor do I know if multitasking may introduce delays while I’m trying to accurately time animation frames.
I decided to play it safe an introduce an intermediary to bit bang the protocol.
Enter the Parallax Propeller
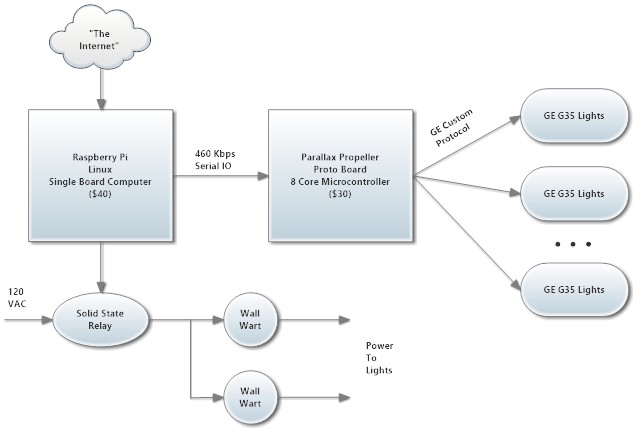
The ‘prop is excellent for tasks like this. It’s an 8-core microcontroller, so I can bit-bang six strands of lights, while using one core to talk to the Pi, and another core for control. The Pi can do our control in a convenient language like Python and interface with the Internet. The Propeller can do the low-level protocol bit banging. Perfect.
This leaves two subtasks:
1) We need a communication mechanism for communicating from the Raspberry Pi to the Propeller
2) We need a propeller object to bitbang the protocol.
#2 was really easily solved. Quattlebaum already wrote a propeller object for the GE lights. It’s available in his git repo. I snagged it, tried it out, and it worked.
Now, on to task #1…
Let’s make a propeller talk to a Raspberry Pi
I consulted the very helpful folks at the Parallax Forum. There were two objects that looked especially helpful to me, one was Peter Jakacki’s FastSerial. The other was JohnnyMac’s jm_serial_rx. JohnnyMac’s code seemed to speak to me in a particularly understandable way, so I decided to go with that object. It was easily capable of handling 460Kbps or even 921Kbps. I constructed a very simple ASCII protocol for sending lighting commands to the prop:
CAAIIBGR<cr>
C = channel [0-5]
AA = address [00-40]
II = intensity [00-CC]
B = blue [0-F]
G = green [0-F]
R = red [0-F]
Those of you who visited deepdarc’s blog will realize the above is almost identical to the protocol that is sent on the wire to the individual lights. All I did was add an extra hex digit to the front of it to specify which channel to use.At 460800BPS, we can do 460800 bytes per second. At 9 bytes per command, that’s 5120 commands per second. At 20 frames per second, that’s 256 bulbs per frame. I modified JohnnyMac’s serial receiver code to receive receive hex digits and push them to a buffer every time a <cr> is encountered. It was necessary to do this bit in PASM instead of SPIN. A separate SPIN module pulls the values out of the buffer and sends them to the appropriate light strand.
I tested this to make sure it’s stable. I even tested it up to 921Kbps and found that it’s stable, but right on the edge of my protocol handling code that I wrote in SPIN. I stuck with 460Kbps to be on the safe side. 256 bulbs is enough to handle five full strands of 50 bulbs.
Note: To make the pi be able to send 460Kbps, add “init_uart_clock=7372800” to /boot/config.txt and reboot. init_uart_clock needs to be sixteen times the baud rate you intend to use.
Driving the lights
I’ve heard that the lights are stable driven at 3.3V, but I figured for a little bit of extra stability, particularly if I run some long cables from the controller to the light strands, I’d buffer it through some 74LS04 hex inverters. This has the advantage of upping the logic values from 3.3V to 5V, as well as putting a little insulation between the prop and the light strands. If there’s a wiring mishap, it’ll be the $0.39 hex inverter that dies rather than the $30 propeller proto board.
Assembly
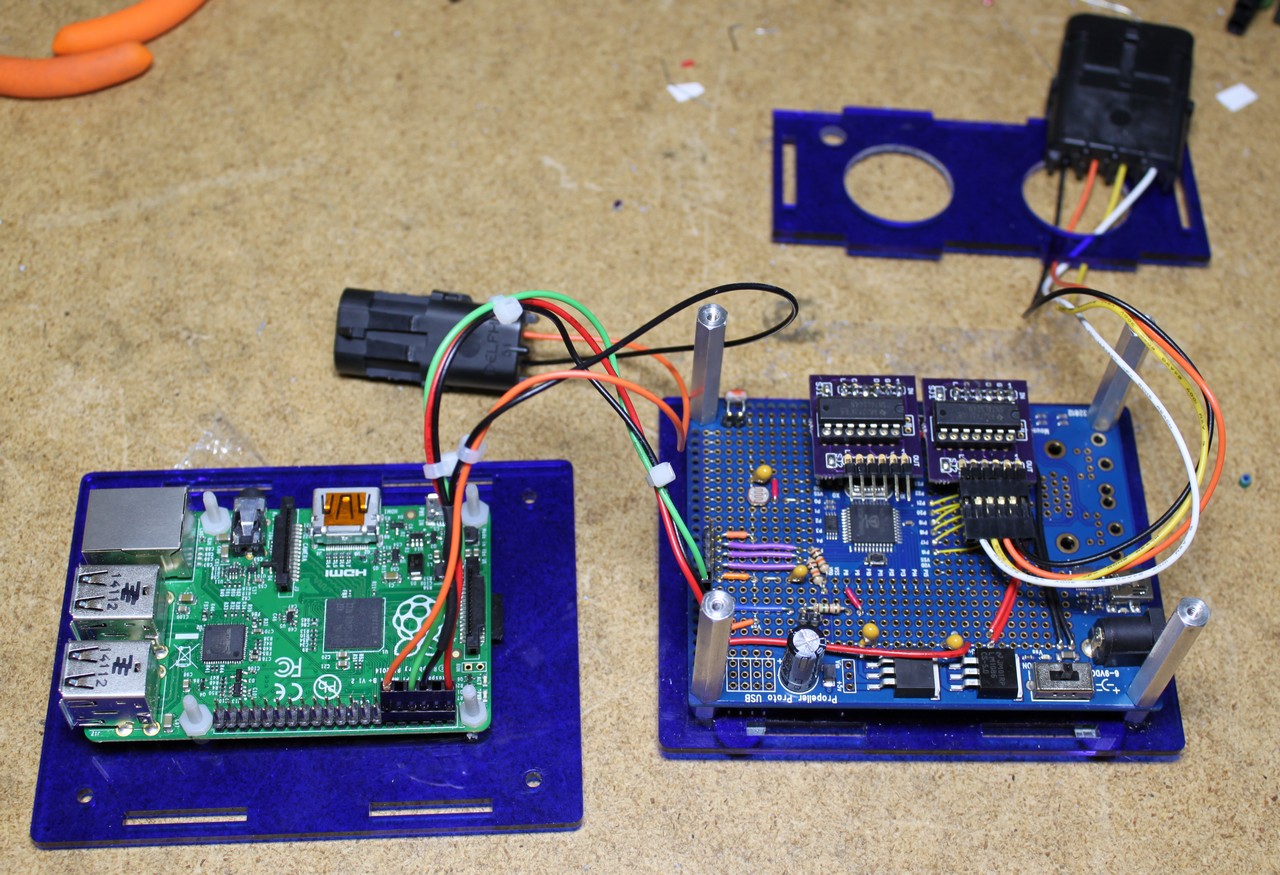
The whole guts fit into one of the Parallax Proto Board cases. Here’s a picture of the case taken apart:
On the left you can see the raspberry pi. On the right is the propeller proto board. There’s a three wire cable that goes between the two of them: Red=5V, Black-GND, and Green-Serial. GPIO 14 on the Pi is serial transmit. I wired this to P8 on the propeller (all pins on a prop are pretty much equal, so I just picked a convenient one). I did run this through a 150 ohm resistor. That’s a little trick that can save expensive microcontrollers from careless programmers that might accidentally in their blundering mistakenly set both devices to transmit at the same time. I should be smart enough to not let that happen, but accidents have been known to happen.
On the proto board, you can see the two hex inverters. These are assembled to little daughterboards that I had from another project that I had. The reason I use two inverters for 6 signals is that I invert each signal twice. That effectively turns an inverter into a buffer.
The 5V regulator on the propeller proto board is sufficient to power both the prop and the pi from a 6V wall wart. It does get a little hot to the touch though; I’m thinking about yanking the regulator out and sticking a switcher in there instead.
For interconnects, I’ve been using Delphi “Weatherpack” connectors. These weatherproof connectors are popular in automotive applications, and I happened to have a kit leftover from the sandrail projects. The 4-pin weatherpack connector feeds the light strands. There’s a smaller 2-pin weatherpack connector that feeds a SSR (solid state relay) that can be used to power down the light strands.
Lights in action
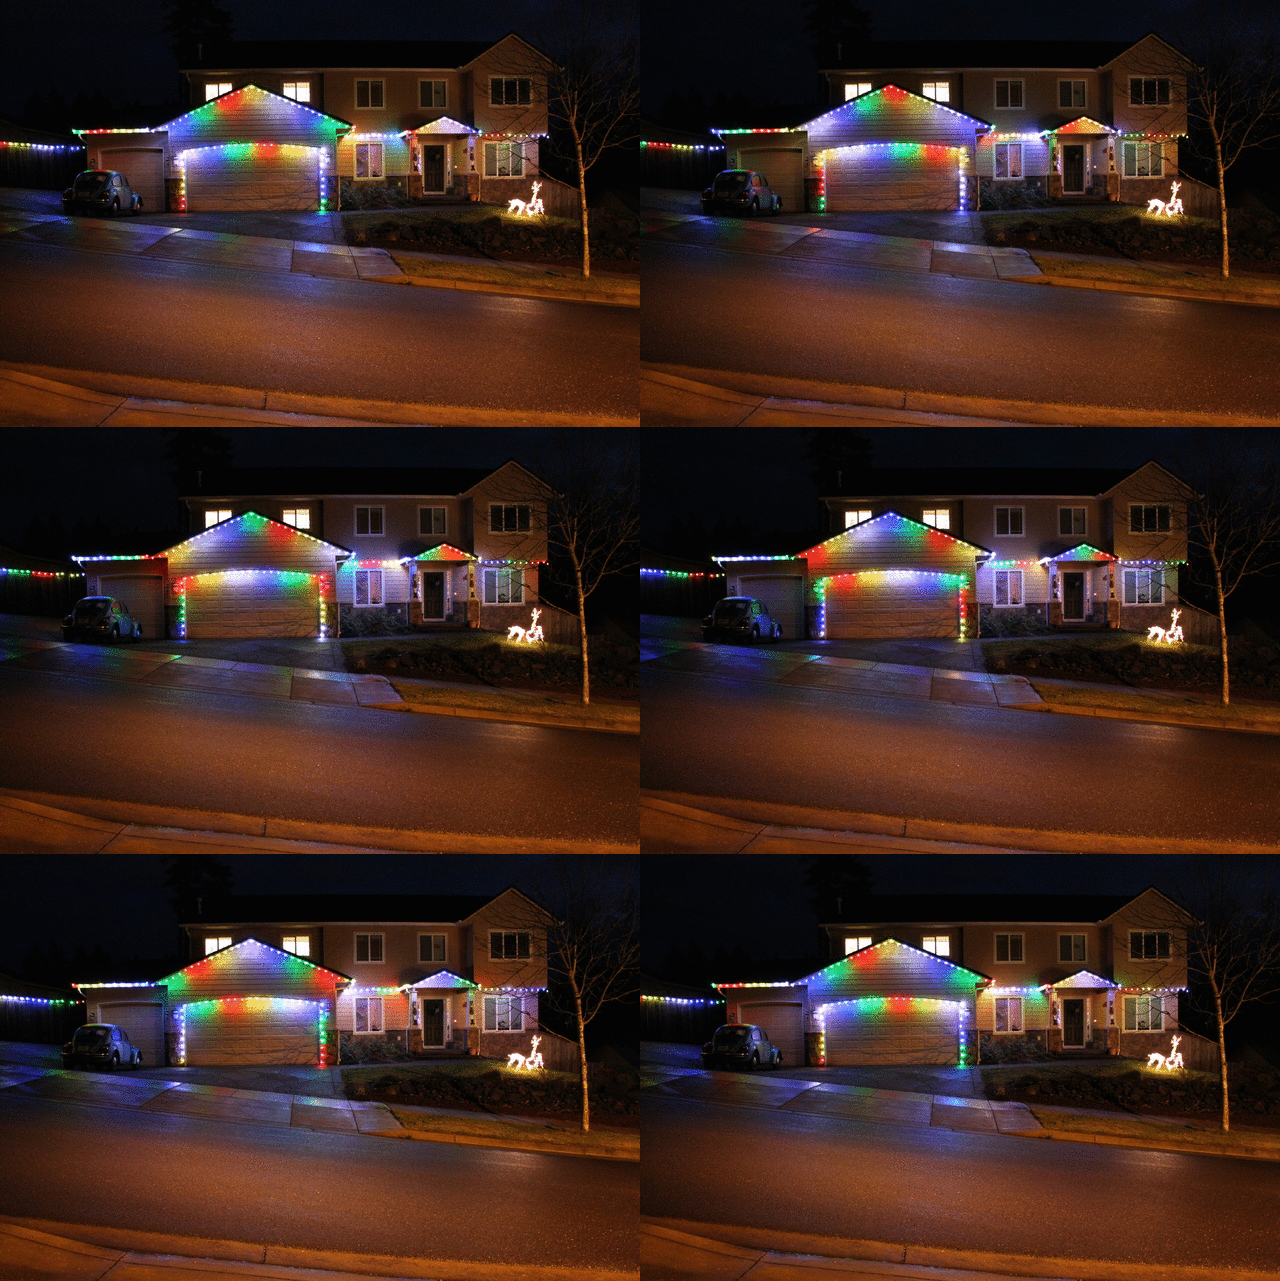
It proved hard to photograph the lights — my camera just doesn’t do video well at night. However, I did take ~ 20 still pictures and stitch them into an animated gif:
The software
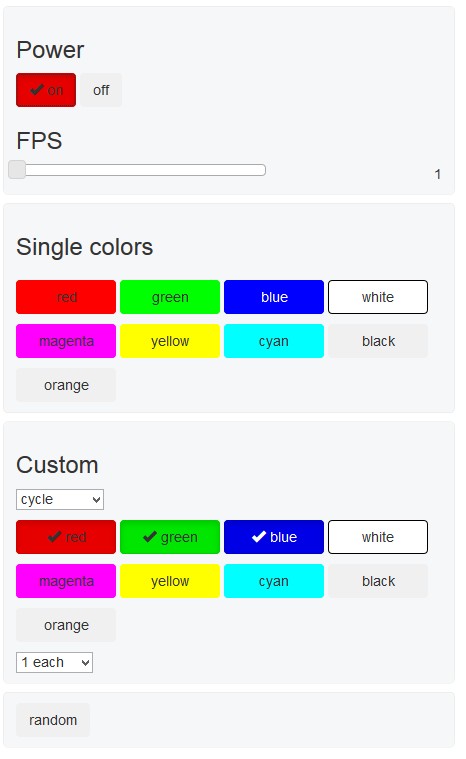
The raspberry pi software has been evolving since I first started this project. It’s currently a django application and has a web UI. The UI is pictured below:
You can find the software in my github repository at https://github.com/sbelectronics/xmas/
There are a few prerequisites:
sudo apt-get install python-pip
sudo apt-get install sqlite3
sudo apt-get install python-dev
sudo pip install Django==1.7
sudo pip install pyephem
After that, the django UI can be started with:
python ./manage.py runserver 0.0.0.0:8000 --noreload
You should be able to reach the UI on your web browser by using the following url: http://<ip-address-of-pi>:8000/xmas/
I have a set of these old costco lights 50 color changing 14 functions. Question: the adapter went bad and when a friend tried to plug in rope light prong adapter, it fried the string.
Is there a way (since I am not electrical minded) to improvise on this string and maybe get it to work again or are they toast? I am in process of throwing them away now. thx much for any clues or good advice.
These lights each have little microprocessors to control the lighting, and it’s likely if you applied the wrong voltage that they are totaled. Nevertheless, you could try to cut the first light or two off the string (making sure to reconnect the wires properly). If you just burned out the microcontroller in the first bulb, then the microcontroller in the second bulb may be fine.
It’s been forever since you did this project. I was wondering if you still are using this setup or if you have moved to something grander.
i’m currenly using Todd’s Fun Arduino setup with the GE G35 Lights..I was lucky and bought 30 sets when I found out that they were going to be discontinued. I have used half of them and saving the others for repairs, etc. No way will I ever sell these as I have not found any other lights out there that compare and non that can be programmed individually.
Currently with my setup, I can only control these via BLE from my iOS devices. I would like to change that so I can control them via WIFI connection and WebUI as this will make more compatible. This way I can automate via SmartThings or control it from anywhere from any device. Sometimes an Android or iOS app is not the way to go.
Hope all is well with you – Happy holidays.
Yes, still using it though I only setup a relatively small number of lights this year — timing wasn’t good for setting up lots of lights.
I too have several spare sets on hand, just in case some go bad.