In this video, I spiff up a Tandy 1000 that I bought on ebay:
Purpose:
A Tandy 1000 was the second computer that I owned, the first was a Tandy CoCo. Note that I keep a slightly different mental “computers that I owned” list and “computers that I used list”. There are a few computer I was able to gain access to and play with perhaps before the Tandy — computers like the Convergent NGEN, and the IBM 5150.
Owning computers is fun, but modifying computers is even funner, so I set about to modify the Tandy 1000.
A few modifications were necessary — for example I didn’t yet own a Tandy keyboard, so I had to make myself an adapter to use a PS2 keyboard on the Tandy 1000. In this post I’m going to document the keyboard adapter, in case other keyboardless Tandy 1000 owners could use the resources in getting their Tandy 1000 up and running.
My Tandy 1000
The model I used in the video, just like the model I owned back in the 1980s was the 25-1000A. This was one of the early models, using an 8-pin DIN connector for the keyboard, as well as having only 128KB of RAM on the motherboard and no DMA chip. The DMA came on a separate RAM expansion board.
My first attempt
I actually started by building the tandy-PS2 adapter over at kbdbabel.org, only to realize after I finished assembling it that the adapter allowed you to use a Tandy Keyboard on a PS2. I wanted to do the exact opposite. Oh well. 😀 It’s not all lost, it might still be fun to hook a Tandy keyboard up to my modern desktop.
My second attempt – Design
I’d already done a few PS2 projects, including a PS2 keyboard adapter for my RC2014 and a PS2 -> Midi adapter that lets my daughter pound on the keyboard and hear music from my roland sound module. For those projects I used an ATTINY85, so I decided to do the same thing again.
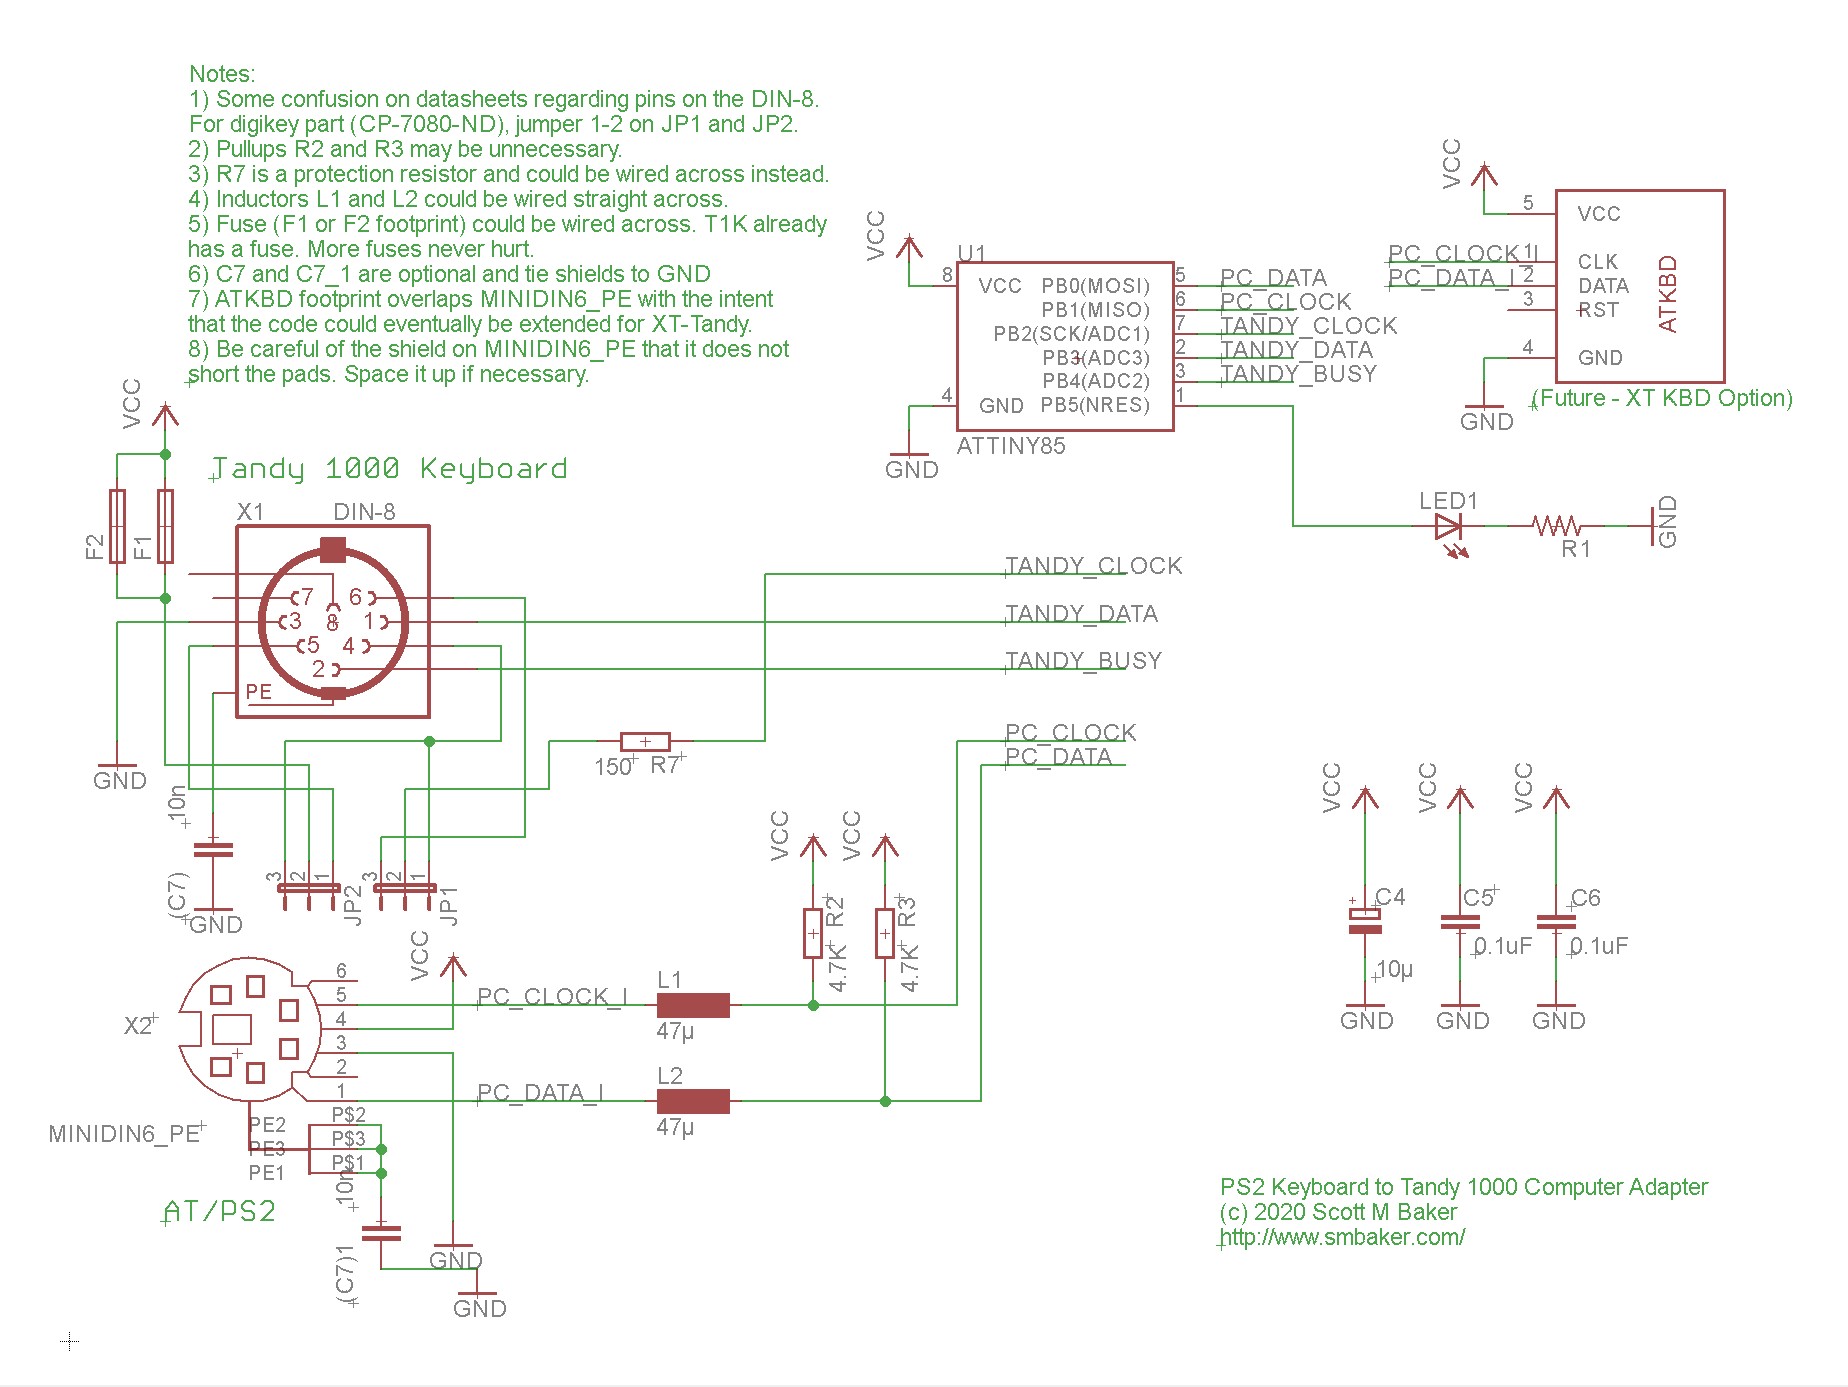
The schematic is show below. It’s really pretty darn simple. One IC does all the work:

There’s a few things that I borrowed from the kbdbabel design, such as the two inductors L1 and L2 that turned out not to be necessary (I just wired them across). The pullups on the PS2 lines may or may not be necessary.
Implementation
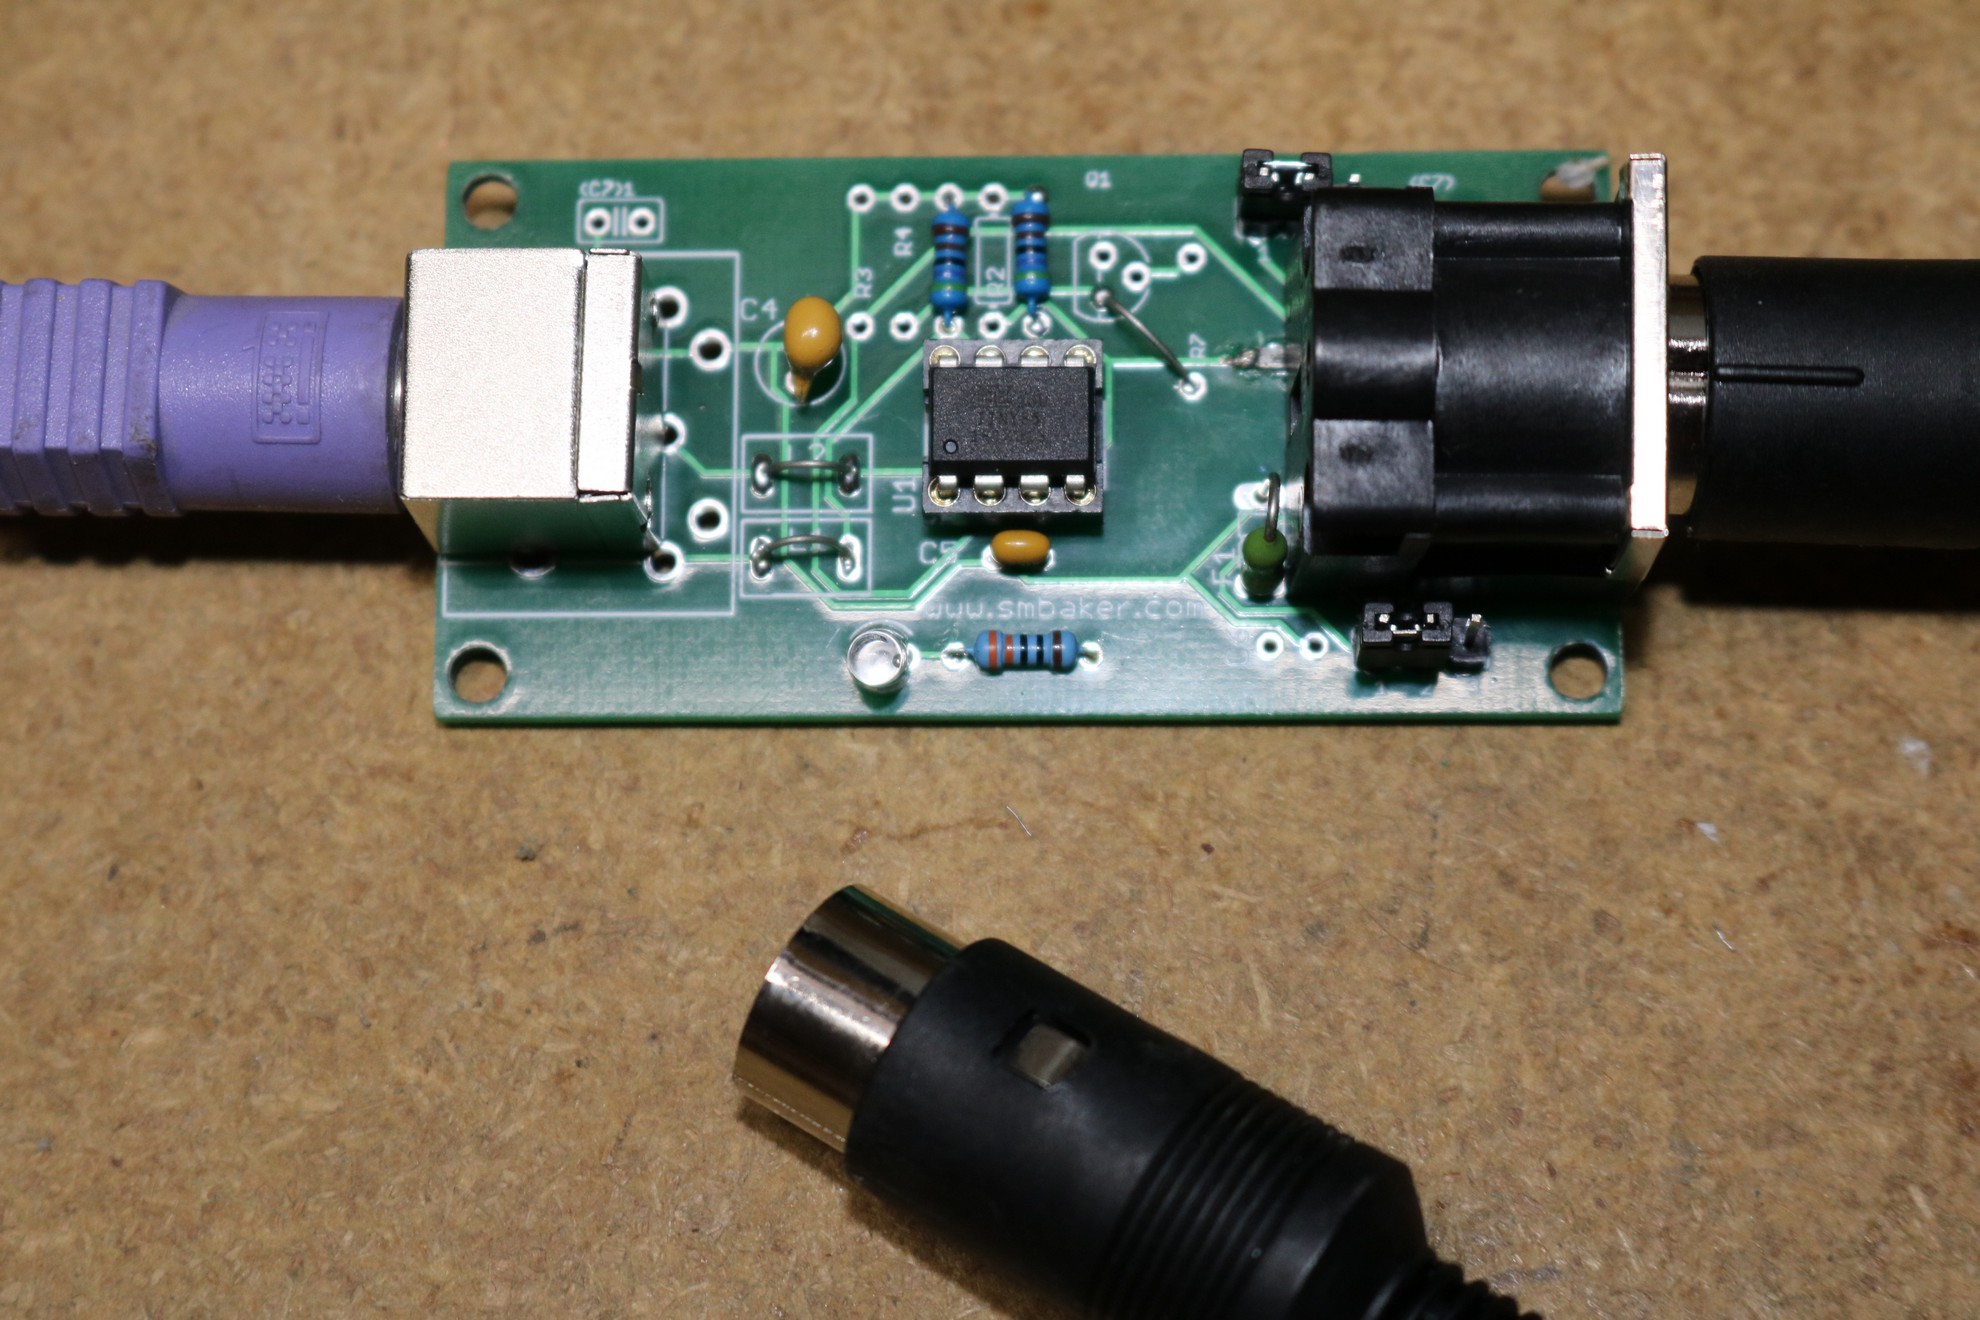
Below is a picture of the completed adapter:

Note that the shield on the PS2 connector does sit real close to a couple pads on the board. When building one, I recommend spacing the connector up a tiny bit. A piece of electrical tape will suffice as a spacer long enough to do the soldering. A business card or a piece of thick paper would suffice as well.
The software
The software is checked into my github repo, and I’ll let the software be its own documentation. It was a bit of a challenge dealing with two things:
- The backslash and tilde keys. On the Tandy 1000 these are mapped to the numeric keypad, but on a PS2 keyboard these two characters have their own unique keys. At first this sounds like a straightforward mapping, but keep in mind that if the SHIFT key or the NUMLOCK is active, then it would cause the tandy’s numeric keypad to output a number instead of a symbol. So you have to fuss with the shift state and make sure shift is correct when sending the scancode to the Tandy.
- The pause/break key. I absolutely hate this damn thing every time I encounter it in a PS2 project. It sends an 8-byte scancode (sometimes; depends on what modifiers you have pushed) that you have to trap and decode and make the right thing happen. Hate it. Don’t know why IBM inflicted the pause/break key or the printscr key on us.
Resources
- Github repository: https://github.com/sbelectronics/ps2-tandy . This is where you will find the source code, the hex files, the gerbers, even the eagle files (it’s a microcontroller hooked to two jacks; you could just point-to-point wire this in a pinch).
Would it be possible to toggle between 2 different output keymaps? The Tandy Model II/12/16/6000 uses a straight ASCII keymap, but late undocumented Xenix updates allowed the use of a re-pinned 2000/1000 keyboard which gave the ‘alt’ key needed for switching virtual consoles. Being able to switch between the two would be nice for TRSDOS compatability.